NOTE: This guide was written for Mastodon 4.0.
Text-Only Instructions
Account Sign Up
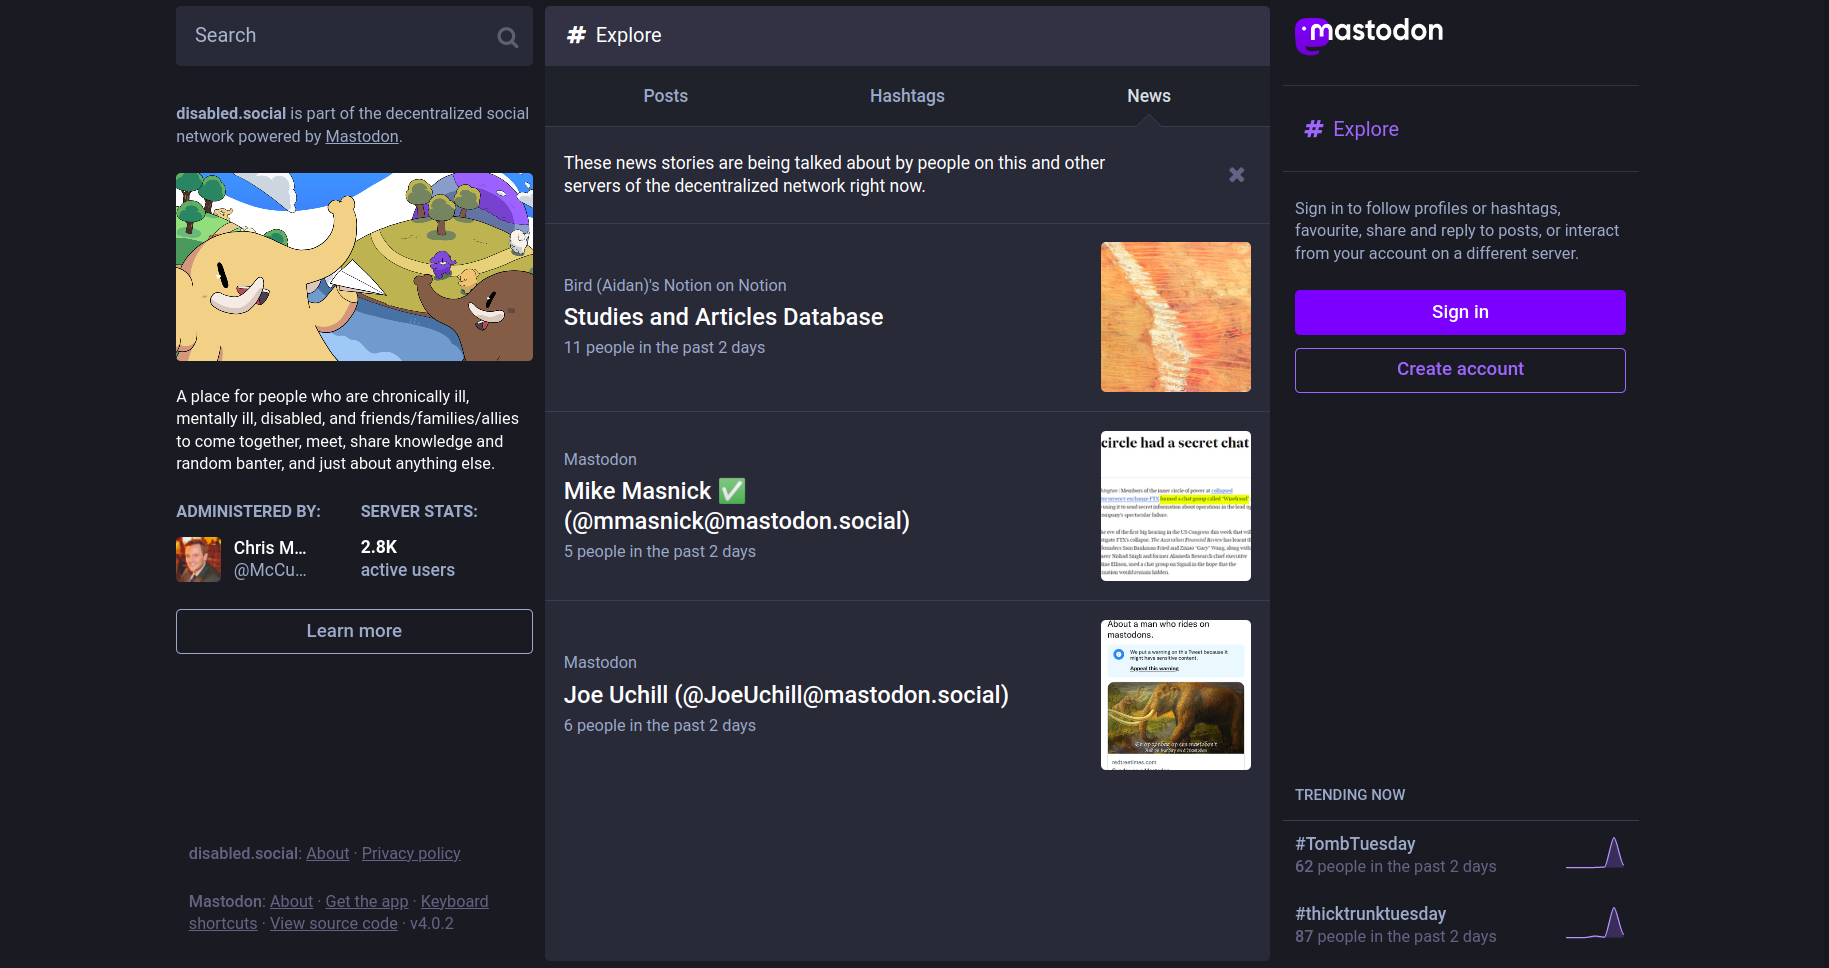
Step 1. In a web browser, type disabled.social. You will arrive at the landing page.
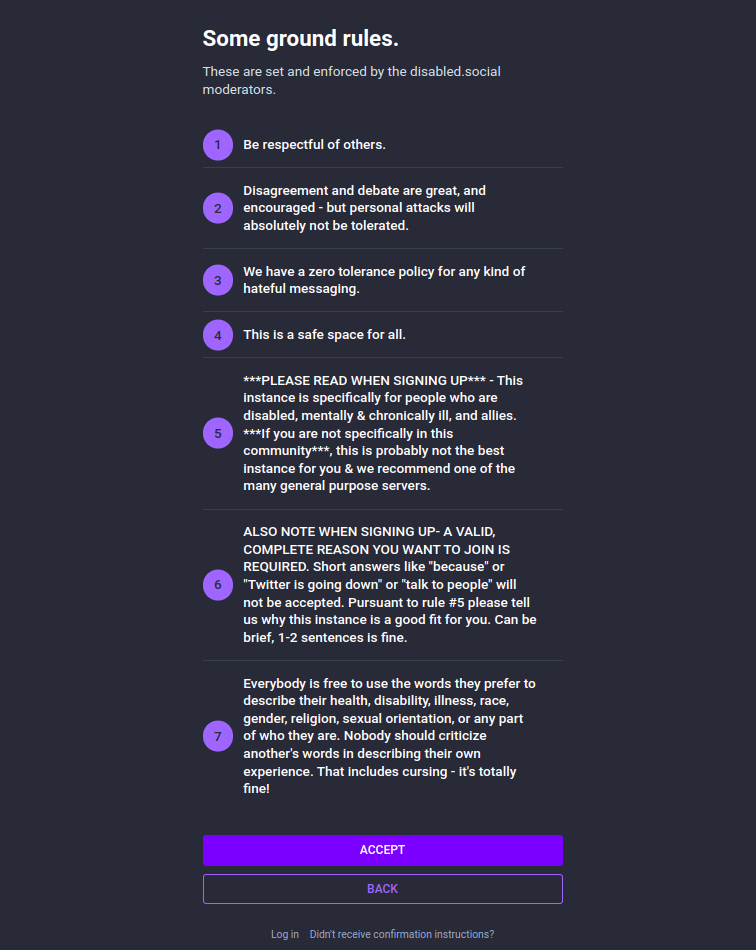
Step 2. When you click the ‘Create account’ button, you will be taken to a new screen that shows you the general rules of the instance. There are two buttons at the bottom of the screen. Click ‘Accept’ if you accept the general rules or click ‘Back’ if you do not.
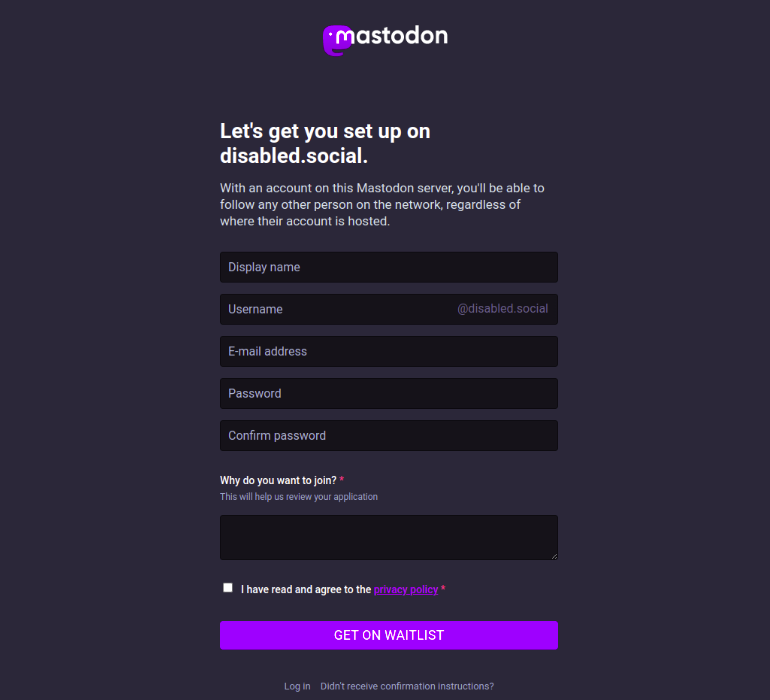
Step 3. Once you’ve clicked accept, you will be brought to the registration page. Choose a display name, screen name (leave off the @disabled.social, the form will append that automatically), the email address you want the confirmation email to be sent to, the password you will use to log in to the instance, and then confirm the password. We also require a reason for why you want to join the instance and how you will be using the instance. Then click the checkbox that you agree to the terms of the privacy policy after you have thoroughly reviewed them. Then click the ‘Get on Waitlist’ button.
After clicking the button, you will receive a confirmation message that says: “A message with a confirmation link has been sent to your email address. After you click the link, we will review your application. You will be notified if it is approved.”. Your request goes into the queue for approval.
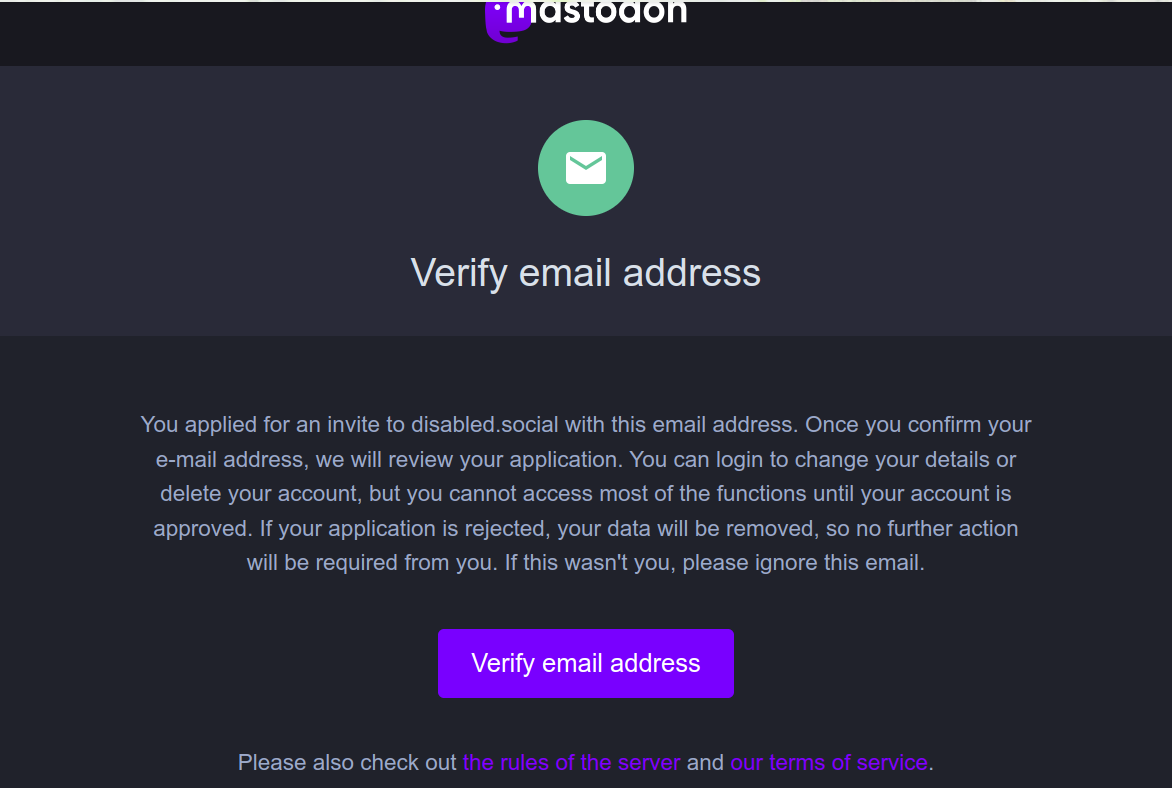
Step 4. You will receive a ‘Confirmation instructions for disabled.social’ email after completing the registration. Click the ‘Verify email address’ button.
After clicking the button, you should see a message that says: “your email address has been successfully confirmed.”
After logging in, you will see one of two screens depending on your application status.
NOT APPROVED
If you see a message that says: “Your application is pending review by our staff. This may take some time. You will receive an email if your application is approved.”, then your application has not been approved yet. You will receive an email once your application is approved.
APPROVED
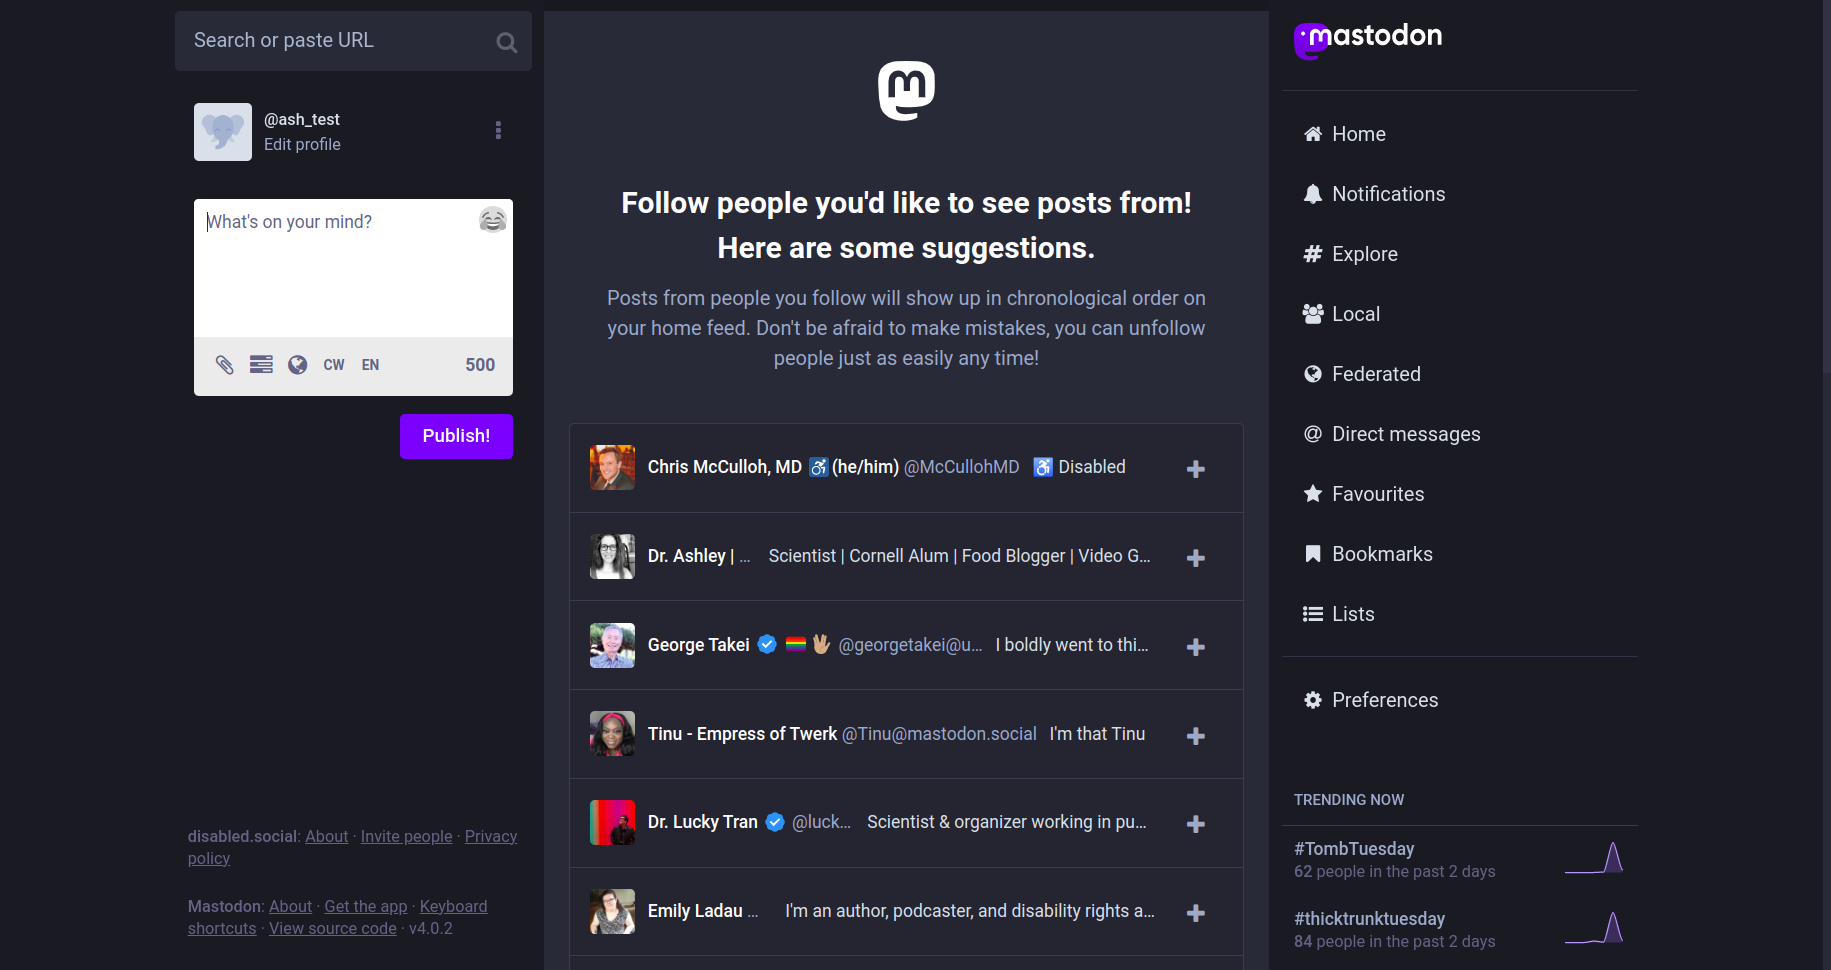
If you see something that resembles a home feed, then you know you have been approved and are all set to start tooting!
Another way you will know you are approved, is if you received a ‘Welcome to Mastodon’ email.
Text + Screenshot Instructions
Account Sign Up
Step 1. In a web browser, type disabled.social. You will arrive at the following landing page:
Step 2. When you click the ‘Create account’ button, you will be taken to a new screen that shows you the general rules of the instance. There are two buttons at the bottom of the screen. Click ‘Accept’ if you accept the general rules or click ‘Back’ if you do not.
Step 3. Once you’ve clicked accept, you will be brought to the registration page. Choose a display name, screen name (leave off the @disabled.social, the form will append that automatically), the email address you want the confirmation email to be sent to, the password you will use to log in to the instance, and then confirm the password. We also require a reason for why you want to join the instance and how you will be using the instance. Then click the checkbox that you agree to the terms of the privacy policy after you have thoroughly reviewed them. Then click the ‘Get on Waitlist’ button.
After clicking the button, you will receive the following confirmation message. Your request goes into the queue for approval.

Step 4. You will receive a ‘Confirmation instructions for disabled.social’ email that looks like the following. Click the ‘Verify email address’ button.
After clicking the button, you should see the following message:

After logging in, you will see one of two screens depending on your application status.
If you see this message, your application has not been approved yet. You will receive an email once your application is approved.

If you see something that resembles a home feed, then you know you have been approved and are all set to start tooting!
Another way you will know you are approved, is if you received a ‘Welcome to Mastodon’ email that looks like this (replaced with the username you selected):

Known Sign Up Issues
If you are having issues with sign up, it’s possible there is an issue with the email client being used.
After testing with different email address extensions, it seems like gmail addresses work ok. But some .edu addresses do not. Universities typically have additional email filtering policies in place that can reject these types of emails at the server level. If that is the case, you might have to sign up from a different email client.
Troubleshooting
I didn’t receive a confirmation email to verify my email address.
There are a few reasons this could happen:
- You might be using an email address with an extension that might have an extra layer of security, such as a .edu address. You have a couple of options. You can contact the university directly and see if they are filtering out emails from Mastodon. If that’s the case, you can ask them to whitelist it. OR, you can try a different email address with a different extension.
- Something else happened.
Regardless of the cause, you have the option to resend the confirmation email. You will see on many of the screenshots above, that there is a hyperlink at the bottom of the screenshot with the text: “Didn’t receive confirmation instructions?” Click on that, and the following screen will pop up:
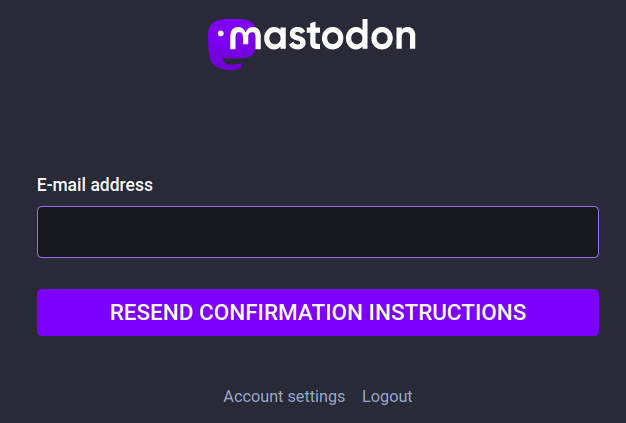
Enter in your email address that you used to register and click the “Resend confirmation instructions” button.