NOTE: This guide was written for Mastodon 4.0.
Introduction
Content warnings are a way of alerting a reader to potentially distressing content. It is a way of creating consent by giving the user the choice of explicitly opting in or not to see specific forms of content.
Examples of content warnings: medical trauma, abuse, car accidents, suicidal ideation, nudity, etc.
When using content warnings, it is best to stick to general topical areas versus giving details, because the details themselves can be triggering. And because Mastodon has an explicit way of dealing with content warnings, you can leave off the letters ‘CW’ if you want to.
The instructions for mobile and desktop are the same, which is why there is only one set of screenshots.
In this guide, we will teach you how to:
- adjust your sensitive content settings
- add a CW
- how to correct a missing CW
User Settings
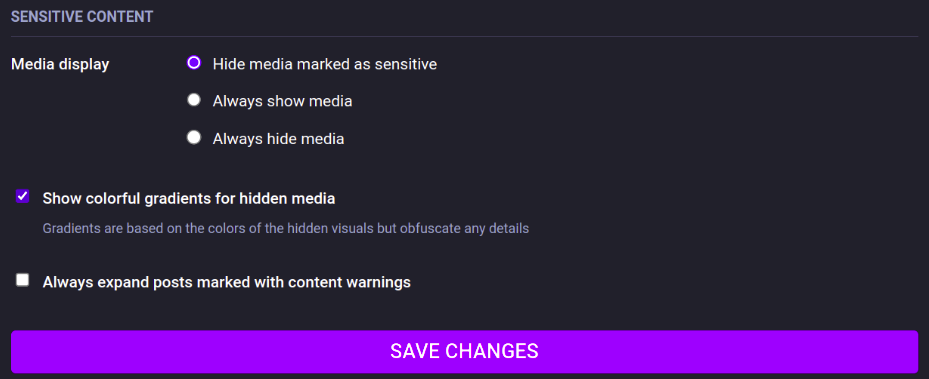
There are settings that users can change for how to handle sensitive content for their account. These can be found under Preferences –> Appearance.
The first set of options pertains to displaying media. There are three options: hide media marked as sensitive, always show media, or always hide media. For media that you elect to have hidden, you can elect to have it shown as a colorful gradient (see screenshots below for what that looks like).
You can also choose to always expand posts marked with content warnings.
If you make any changes to your settings, be sure to save the changes.
Text-Only Instructions
How to Add a CW
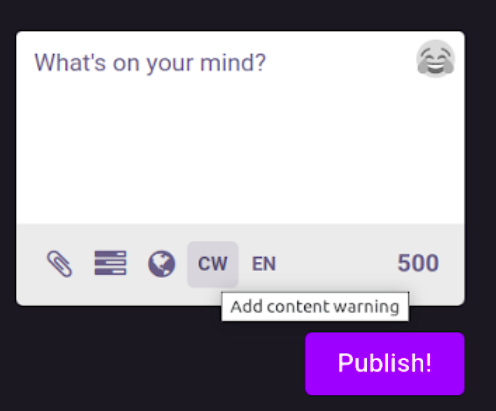
Step 1. Click ‘CW’ below the toot textbox.
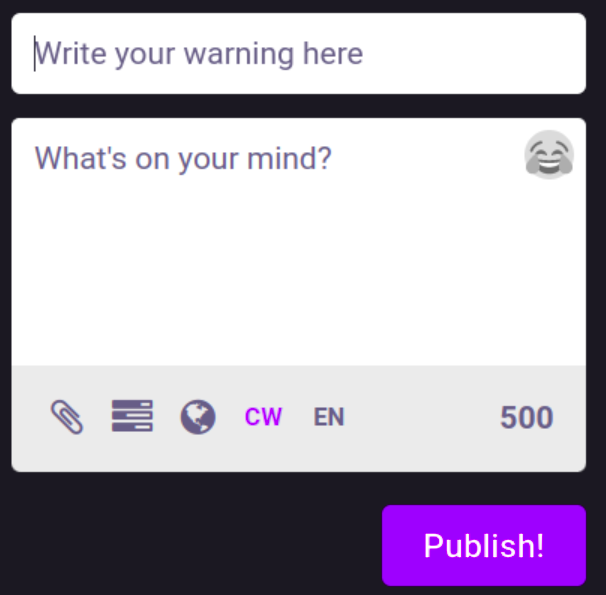
Step 2. This will bring up an additional textbox above the toot for you to write in the content warning. You will also notice that ‘CW’ below the toot textbox is highlighted in purple.
Step 3. Write in the content warning, draft up a toot, and then click the Publish button. All the user will see on their end is the content warning and then a place where they can click to ‘show more.’ If there is no attached image, this is what it will look like. If there is an attached image, there will be a blurred out image shown to the user in addition to the above elements.
Now the only way a user can see the content is if they click ‘show more.’ And if a user clicked on it and they didn’t want to see it, they can click ‘show less’ to hide it again or quickly scroll away (scrolling away is probably the better option so you don’t have to look back at the screen to see where to click ‘show less.’)
How to Correct a Missing CW
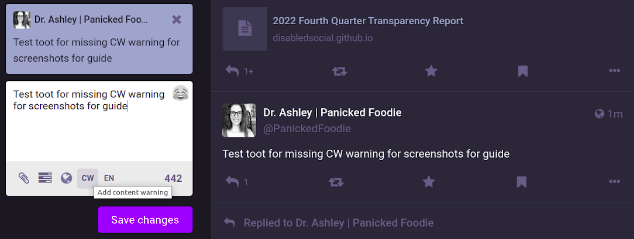
Step 1. Navigate to the toot with the missing CW, click the three dots in the lower right hand corner, then click Edit.
Step 2. The toot will open up on the left hand of the screen, allowing you to edit it and add a CW. Follow the instructions above on How to Add a CW and then click ‘Save Changes.’
Text + Screenshots Instructions
How to Add a CW
Step 1. Click ‘CW’ below the toot textbox.
Step 2. This will bring up an additional textbox above the toot for you to write in the content warning. You will also notice that ‘CW’ below the toot textbox is highlighted in purple.
Step 3. Write in the content warning, draft up a toot, and then click the Publish button. All the user will see on their end is the content warning and then a place where they can click to ‘show more.’
If the content warned toot does not have an accompanying image, this is what it will look like on both mobile and desktop:

If it does have an image, it will look like this (with gradient setting enacted according to the instructions above in the User Settings section):
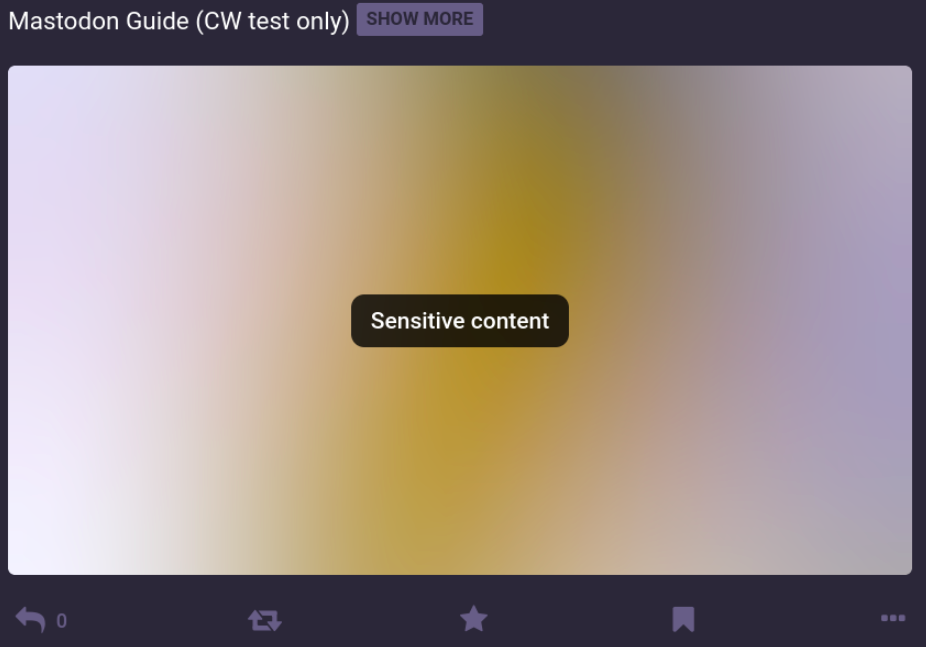
Now the only way a user can see the content is if they click ‘show more.’ And if a user clicked on it and they didn’t want to see it, they can click ‘show less’ to hide it again or quickly scroll away (scrolling away is probably the better option so you don’t have to look back at the screen to see where to click ‘show less.’)

How to Correct a Missing CW
Step 1. Navigate to the toot with the missing CW, click the three dots in the lower right hand corner, then click Edit.
Step 2. The toot will open up on the left hand of the screen, allowing you to edit it and add a CW. Follow the instructions above on How to Add a CW and then click ‘Save Changes.’